Take React debugging to the next level, with AI assistance. Join Zipy!
Get Started for free
.svg)


See how thousands of Engineering, Product and Marketing Teams are accelerating their growth with Zipy.


Deploying React, Vue.js, or Angular applications is different from deploying a website built using HTML, CSS, and Javascript. Hosting services have a decent affect on your websites performance, and that calls for a careful selection.
In this article we will walk you through some popular and free serverless hosting solutions to deploy your React app. With these solutions you can go live in a jiffy, deploy updates on the fly, and even cut the cost.
Firebase is a versatile platform that allows you to create and deploy various types of applications, providing a suite of tools to enhance functionality and scalability. These include real-time databases, user authentication services, Cloud Firestore, and cloud functions, among others.
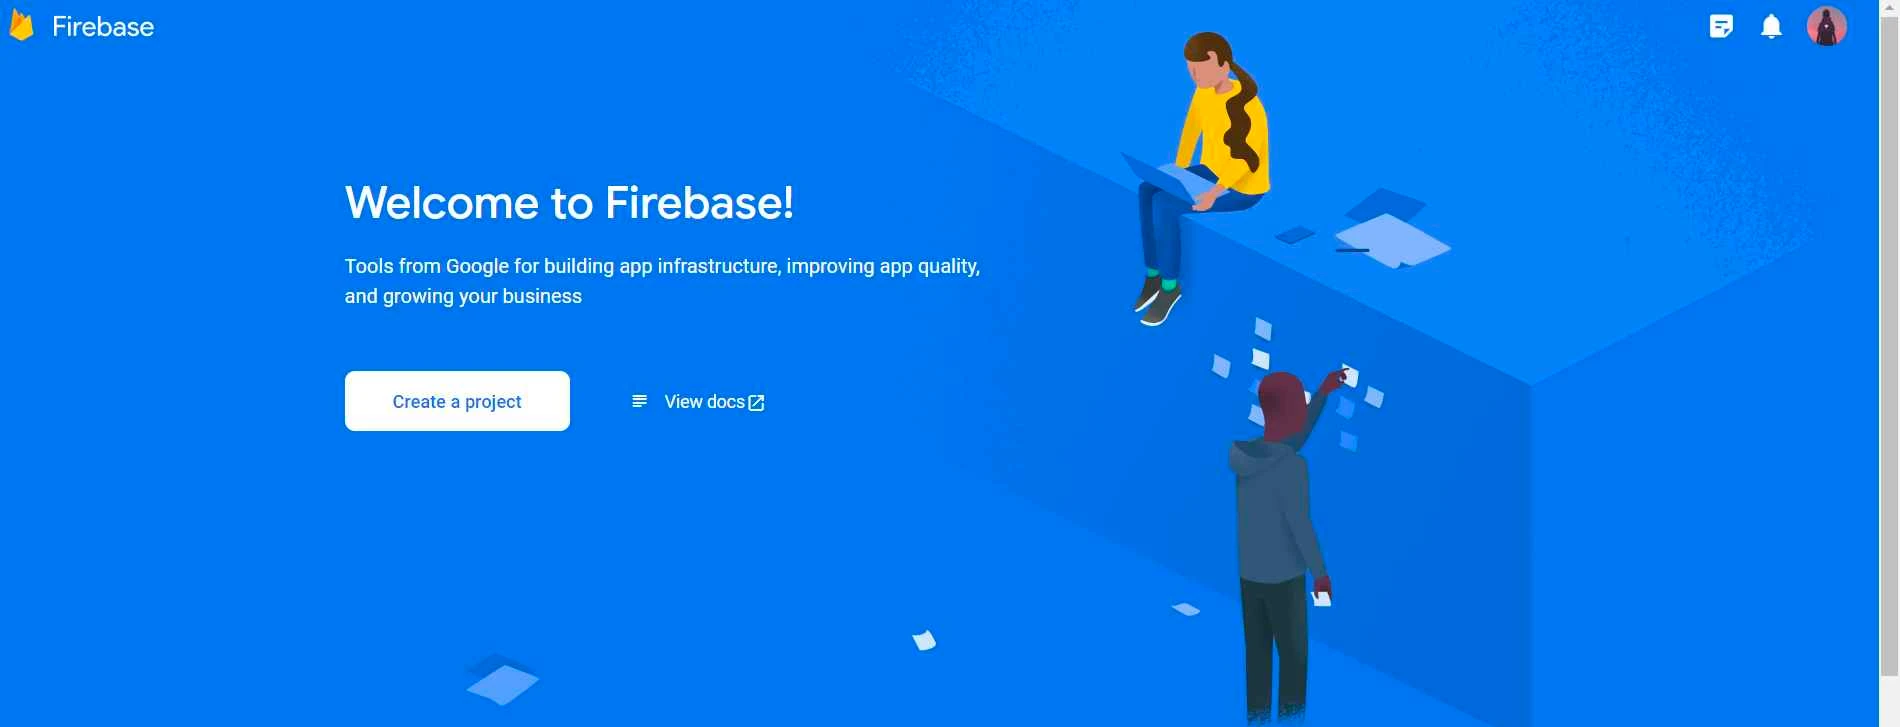
To deploy a React application to Firebase, begin by setting up an account on the Firebase website. Once logged in, navigate to the sidebar, select "Hosting," and then click on "Get started." Before you can use Firebase Hosting, you'll need to establish a Firebase project, which is a prerequisite for proceeding with the deployment. This setup ensures that all the necessary configurations and dependencies are in place to host your application efficiently.
You can manage, view, and deploy Firebase projects via Firebase CLI. Let’s see the steps to install it.
Login with your Firebase account or integrate it with your Google account.
After logging in successfully, you need to change your to the project root directory. Now, you need to initialize a firebase project in your react app by running the following command in the the console
You will now be prompted with options in the Firebase Command Line Interface (CLI) which will ask you to set up a Firebase feature for a specific folder. Press the space bar to select the desired features and then press 'Enter' to confirm.

By selecting the appropriate features, the user can set up Firebase for their project in a way that meets their specific needs and requirements.
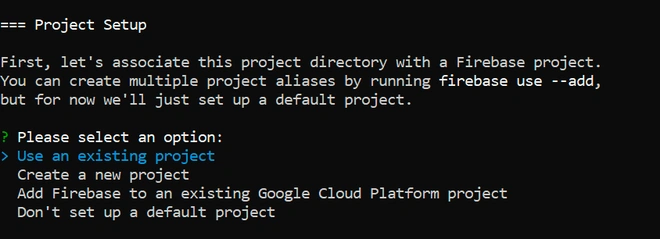
As soon as you choose the hosting option. It will associate your project directory with a firebase project in order to use Firebase services.
Note: If you choose `Create a new project` then it will generate a unique project ID.
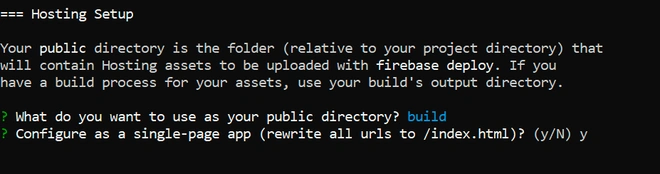
Now, you'll need to specify the directory that contains all the hosting assets to be uploaded with firebase deploy. However, this will be the public directory where you can publicly access all the files. At last, CLI will ask you if you want to configure your Firebase Hosting as a single-page app. Type 'Y' to configure a single-page app.
And it’s done, you just completed the firebase initialization, now we just need to run a few commands to make our react app functional. Run the below command to build your react app:
Run the below command to deploy your react app:
Your terminal will show the hosting link for the project; you can browse deployed site link to check whether or not your React app was successfully deployed.
Surge is a streamlined static web publishing platform that simplifies the process of deploying and hosting static websites and web applications. It offers a swift and dependable method for developers to share their web content globally without the complexities of server setup or configuration.
Using a straightforward command-line interface, developers can easily publish their static websites or web applications right from their local development environments. This feature makes Surge an appealing choice for developers looking for a hassle-free hosting solution that allows them to quickly move from development to deployment.
Follow these deployment steps:
Render is a cloud-based hosting platform that streamlines the process for developers to deploy and manage their web applications. It combines various hosting services such as web hosting, container hosting, and database hosting into a single, cohesive platform. Developers can deploy their web applications and APIs from multiple sources such as Git repositories, Docker containers, and static files, making Render a versatile option for various deployment needs.
Render offers two primary methods for deployment. Let's explore each of these methods in detail:
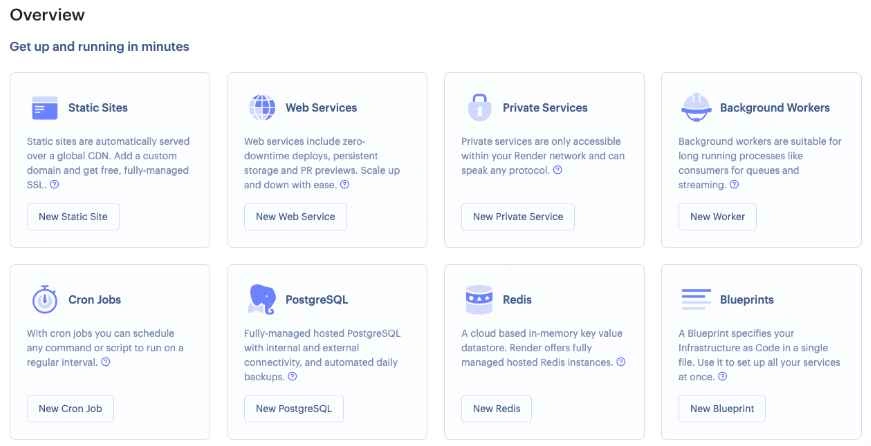
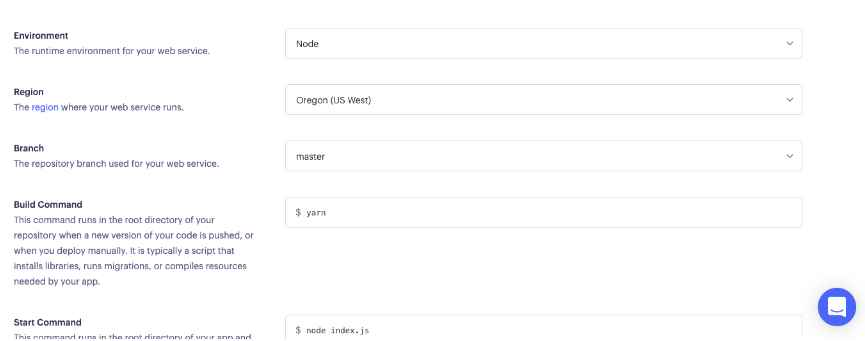
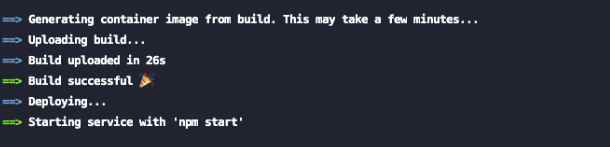
Render Dashboard has an intuitive way for deploying, managing your services, databases, and other resources, as well as monitor their performance and usage. Follow these steps to deploy React app.
GitHub Pages is a static website hosting service that allows you to host your React app directly from a GitHub repository. This service makes it easy to showcase your projects, portfolio, documentation, and more by turning a repository into a website. GitHub Pages also supports the use of GitHub Actions to automate deployments, establish continuous integration and delivery, and perform many other tasks, enhancing the deployment process.
To deploy a React app to GitHub Pages, the first step is to register for a GitHub account. Once you have your account set up, you can create a new repository specifically for your application. Upon creation, GitHub will provide a repository URL and a Git URL, which are essential for managing your project's files and enabling deployment. Here's how you can proceed to make your React app live using GitHub Pages.
Vercel is a cloud-based platform designed to streamline the creation and delivery of web apps, particularly excelling with its focus on serverless architectures. It supports a variety of web frameworks and programming languages, including React, Angular, Vue, and Next.js. A standout feature of Vercel is its seamless integration with version control systems like GitLab and Bitbucket, making it easier for developers to import projects directly from these platforms.
To begin using Vercel, simply create an account using OAuth to log in with your preferred version control tool. This integration facilitates a smooth setup and management process for your projects.
Vercel provides two methods for deploying React applications: using the Vercel dashboard or the Vercel Command Line Interface (CLI). Let's explore each method:
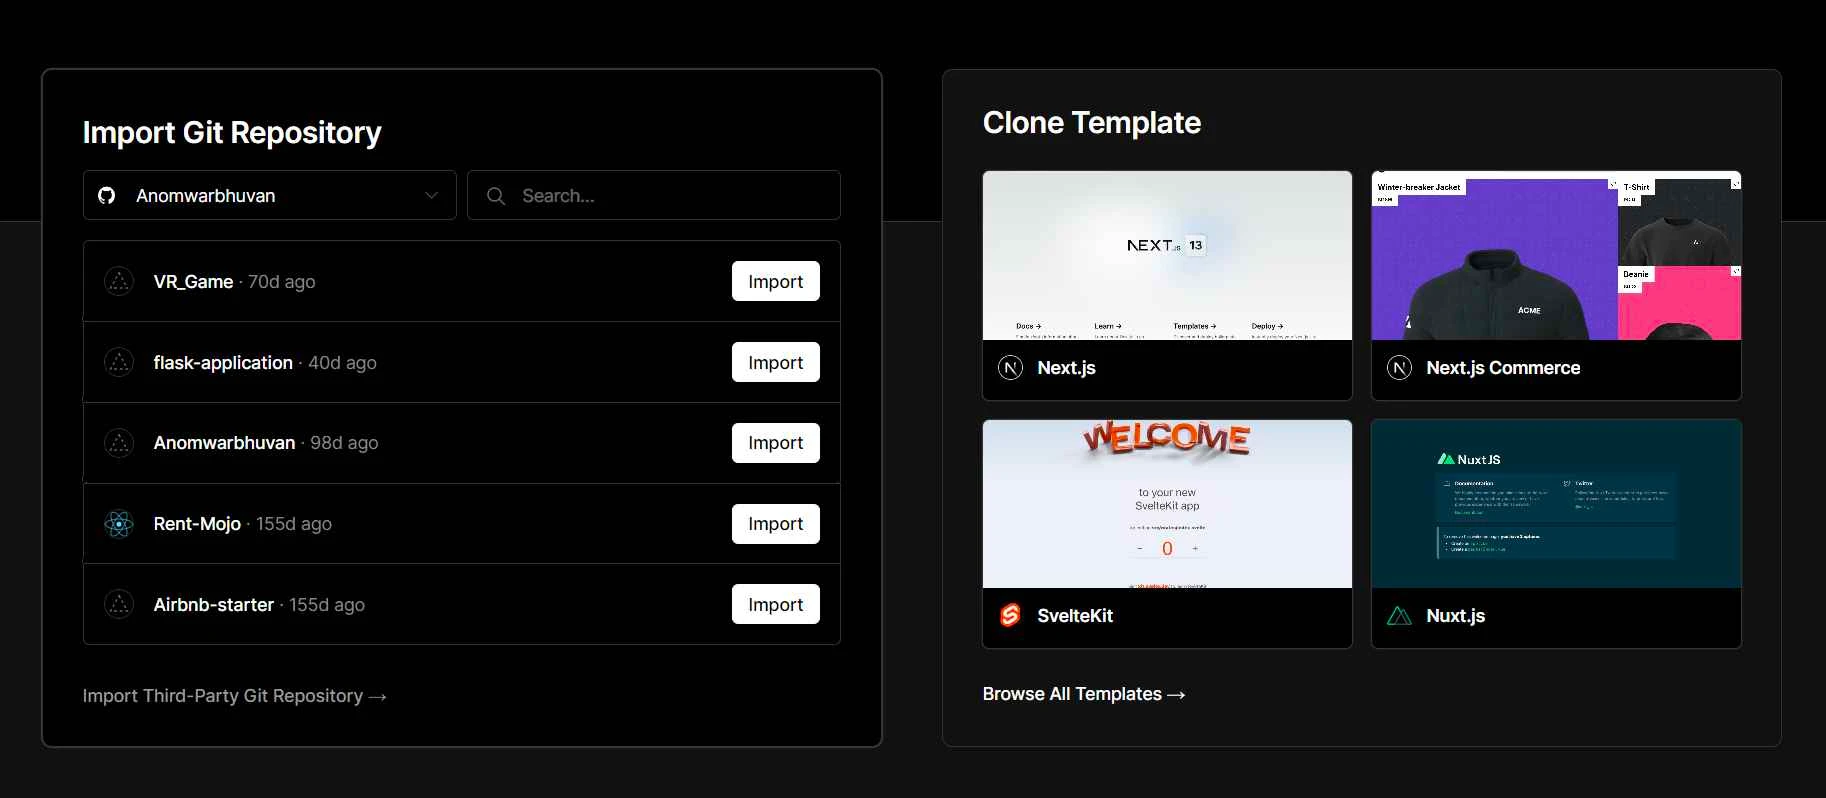
After completing your account creation process, the next step is to integrate with GitHub, GitLab, or Bitbucket. To create your React app into Vercel, click 'Create a New Project'.

Integrate with any of the given version tools like GitHub, GitLab, BitBucket importing your projects from GitHub, GitLab and BitBucket is the same. For now, let’s go through the steps for importing your Git repository to Vercel.

Now that Vercel and GitHub are linked, choose Import Project from GitHub. Click Import after selecting the project you want to deploy and give it a name. Provide the root directory in a similar manner, then click 'Continue'.
Vercel will automatically identify your react app as bootstrapped if it has been initialized and load the appropriate settings. If it is not initialized, you’ll have to manually enter each field's configuration information before you click 'Deploy' button.

That’s it. Your React app is deployed.
The command-line interface tool for Vercel, allows developers to deploy and manage their web projects in a fast and efficient manner. Let’s look at the below steps to deploy our React app using Vercel CLI.
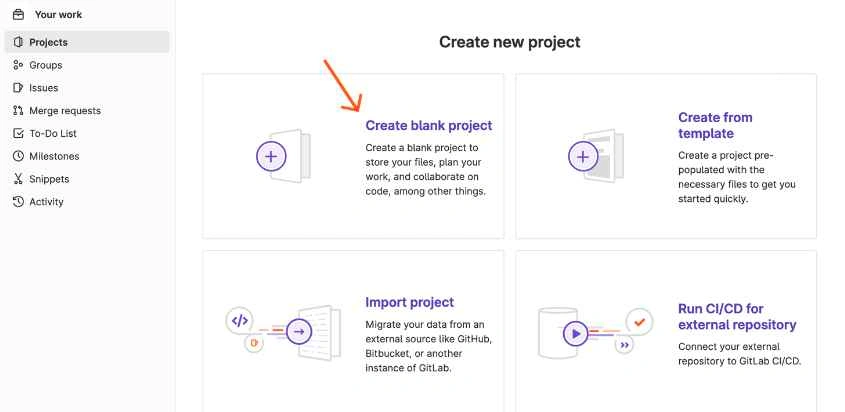
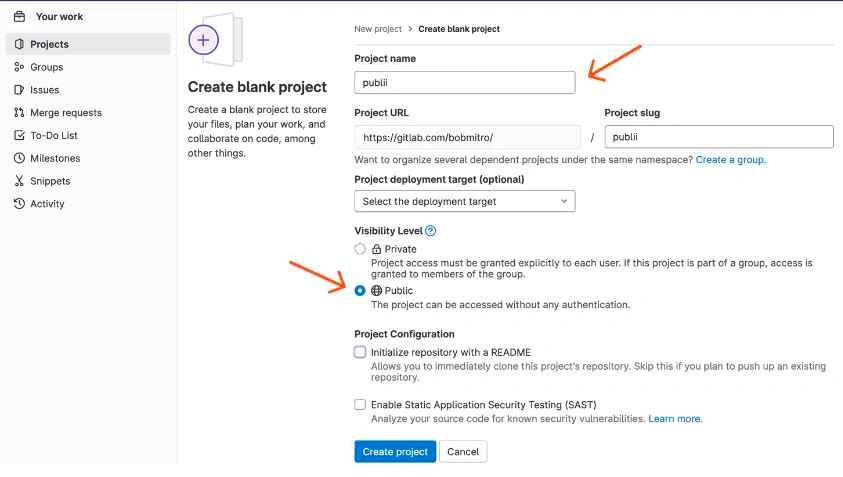
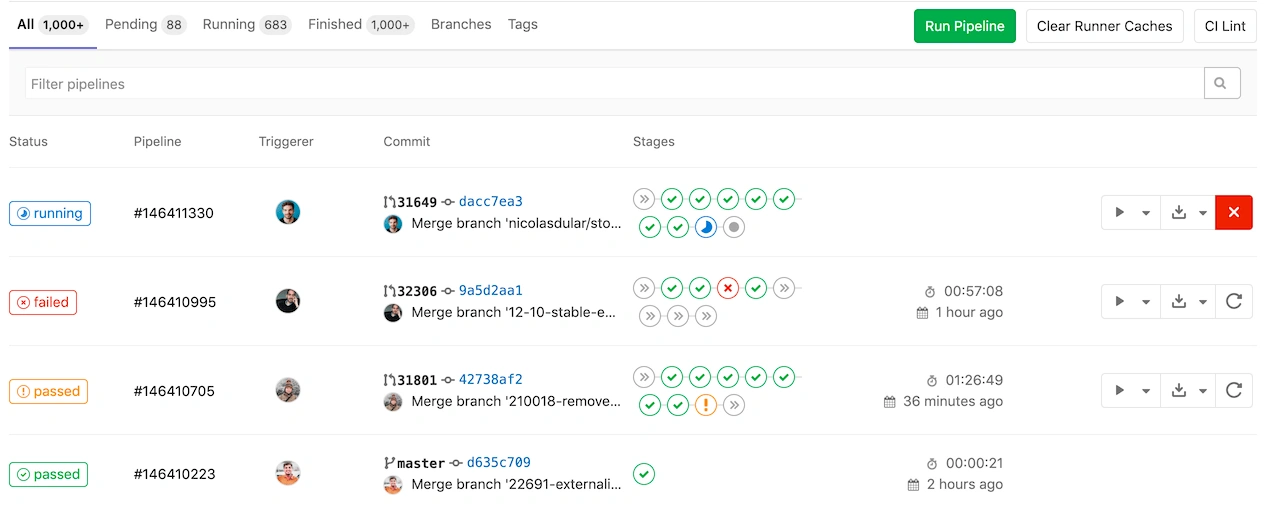
GitLab Pages represents an inclusive web hosting solution seamlessly integrated within GitLab's services. This platform empowers users to effortlessly host static websites, documentation, and various content either on personalized domains or via GitLab's default domain. With GitLab Pages, users can swiftly develop and deploy websites directly from their GitLab repositories, eliminating the necessity for supplementary web hosting services or infrastructure.
Follow these steps to deploy your React app:
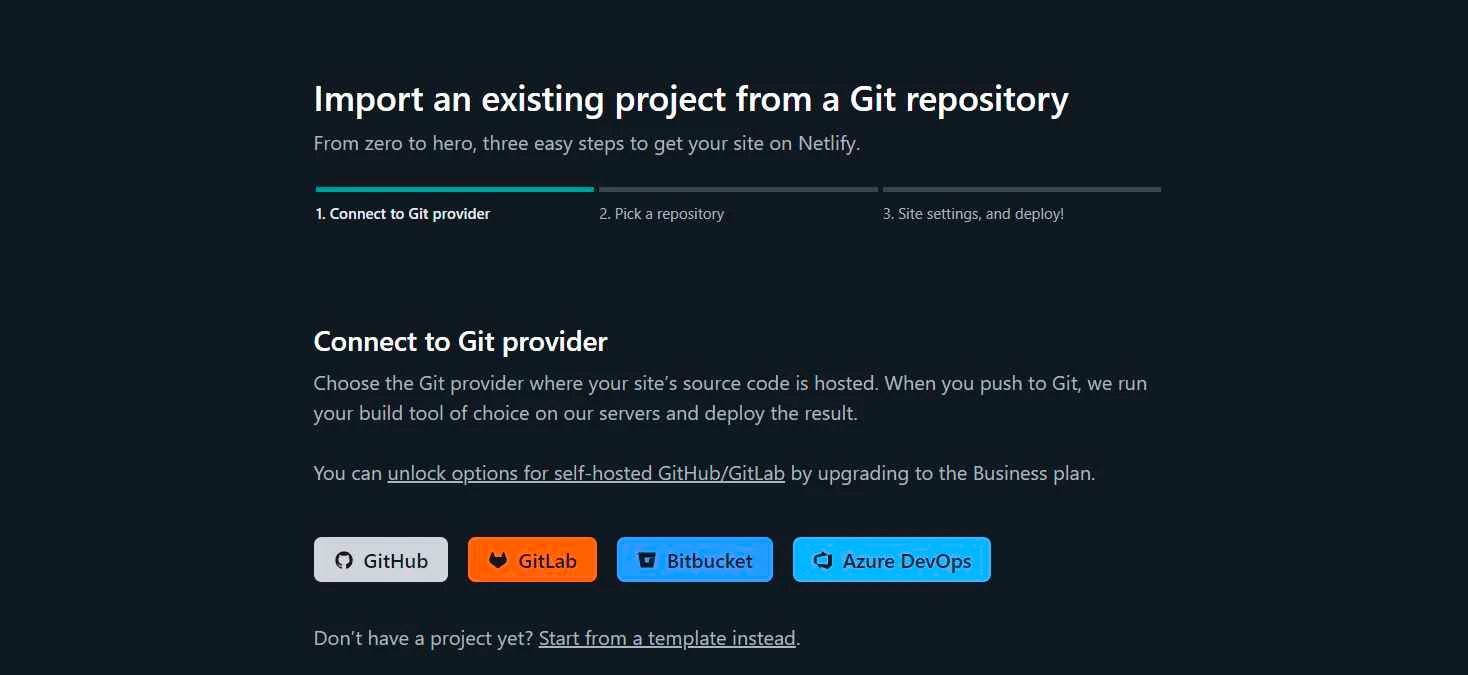
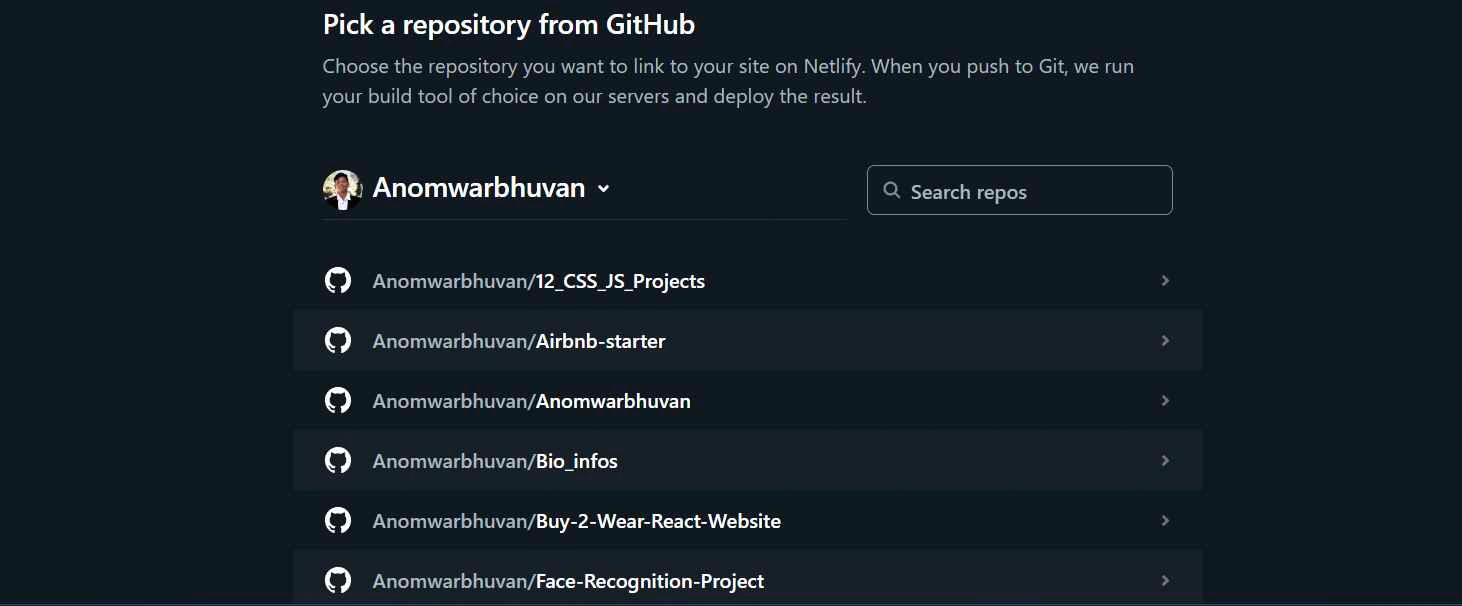
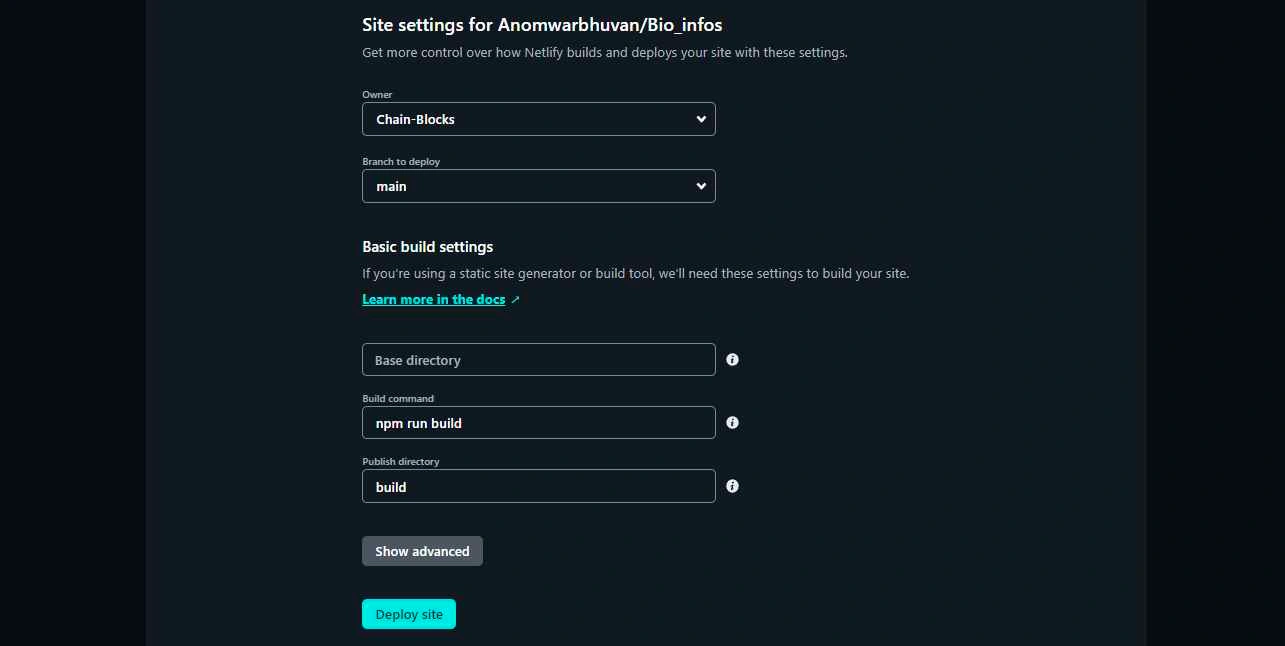
Netlify, a renowned web deployment service, excels in website management, automation, and building. It offers seamless integration with GitHub, GitLab, and Bitbucket for project imports. Renowned for its rapid deployment capabilities, Netlify ensures swift deployment of your React application. However, prior to executing any commands, ensure to run the build command to generate production-ready files for deployment.
There are two ways to deploy React app on Netlify, you can do it either through Netlify dashboard or Netlify CLI.
You can deploy React app deploy to Netlify all at once using the drag and drop functionality.
You can use Netlify CLI to run a local development server that you can share with others, run a local build and plugins, and deploy react app.
Below steps will guide you to the command line prompts needed while deploying your application:
Note: Your site is automatically secured by Netlify over HTTPS.
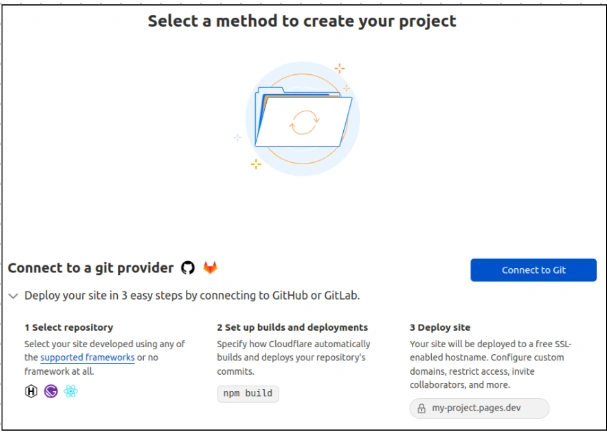
Cloudflare Pages is a web development architecture based on Javascript, APIs, and Markup (JAM). It's a great platform for frontend developers to collaborate and deploy websites. This app comes with automatic SSL encryption for all sites and ensures the security of your sites. Not just this, it acts as a visual editor for building static websites and supports popular frameworks like React and Vue.js.
To deploy React app on Cloudflare Pages, you can follow these steps:
Configure the build directory for your react app and it should match the directory of your compiled react app location. Add necessary environment variables for your react app in the 'Environment Variables' tab.
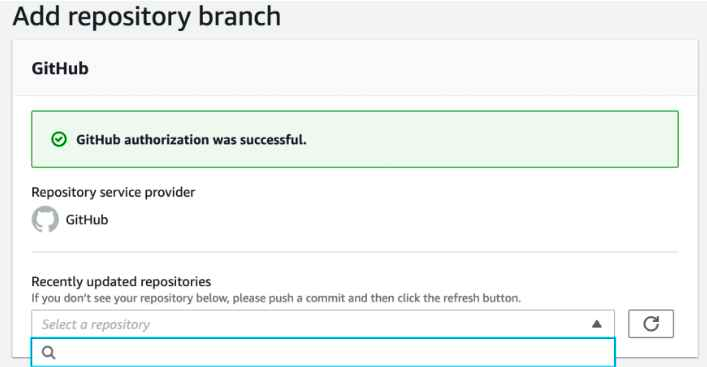
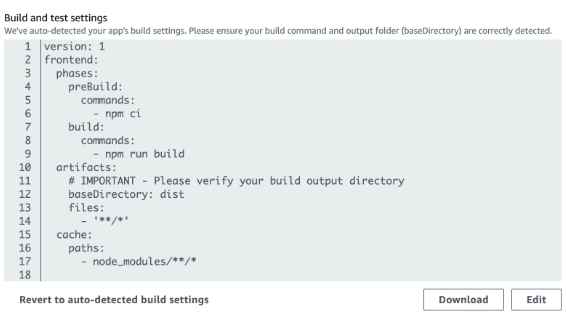
AWS Amplify stands as a robust cloud-based platform tailored for developers, offering an extensive array of tools and services to construct scalable and secure cloud-driven applications. Through Amplify, developers can swiftly craft mobile and web applications harnessing the capabilities of AWS services like Lambda, API Gateway, S3, and numerous others.
You can deploy React app using these steps:


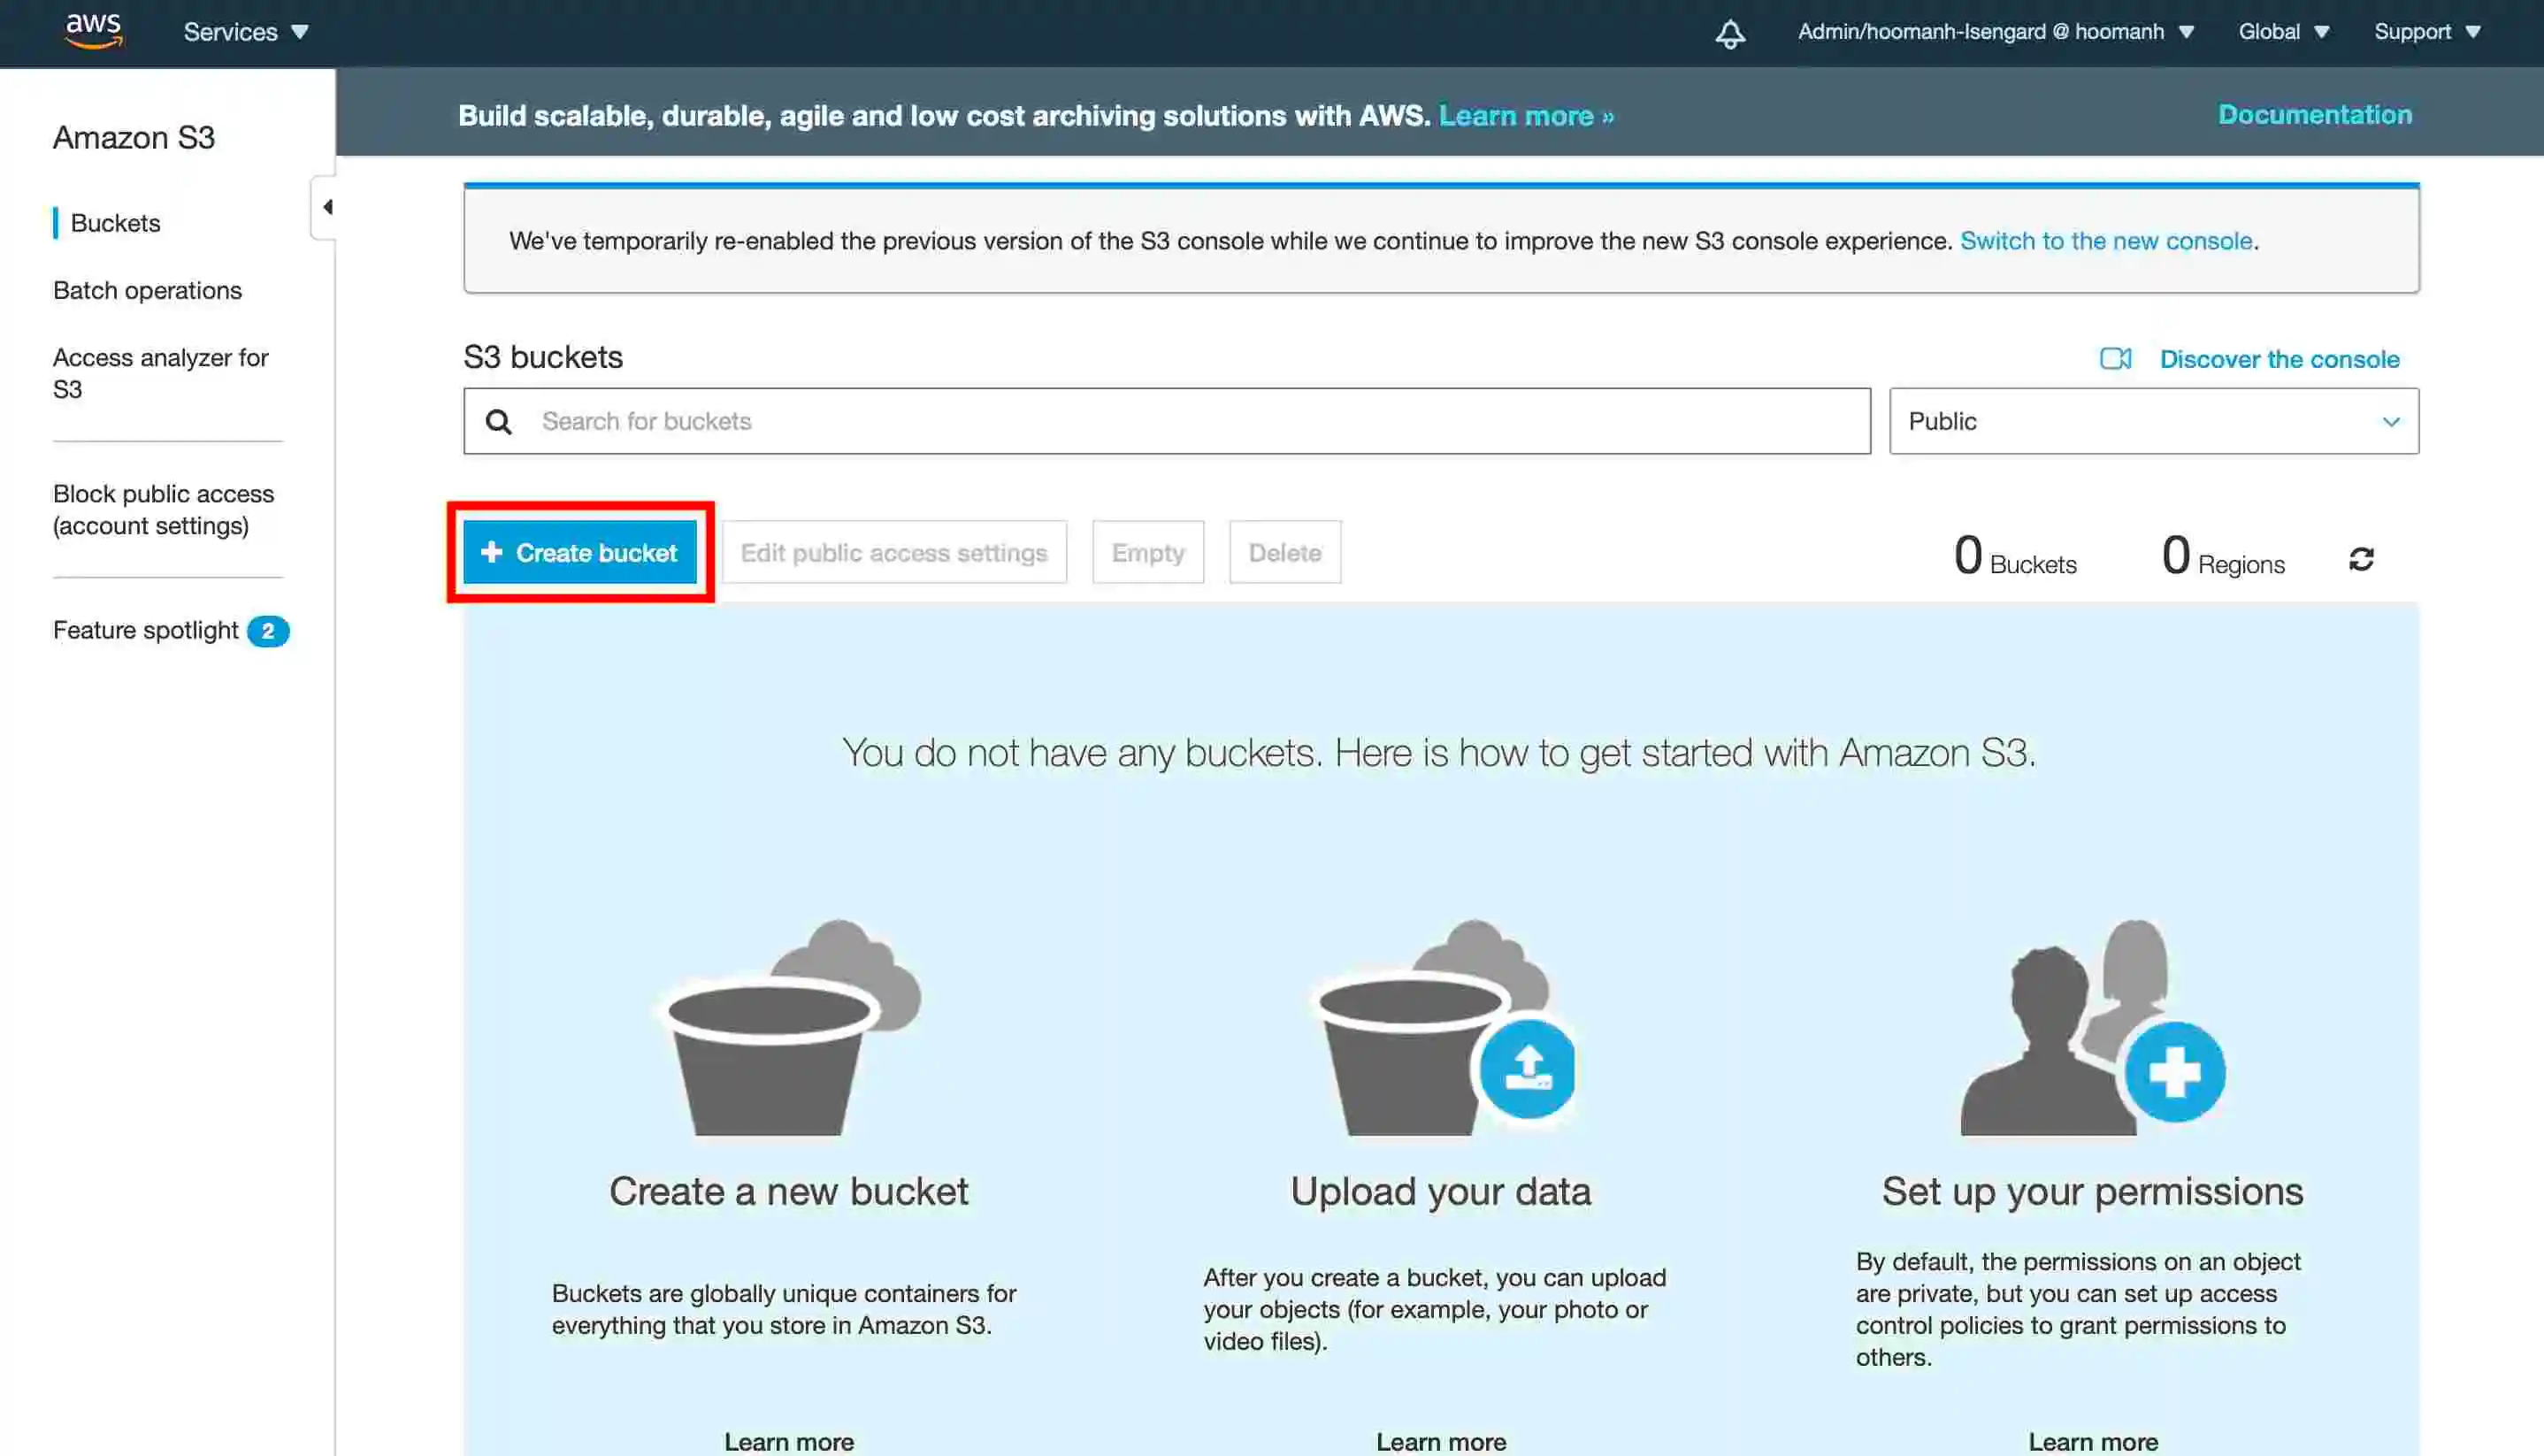
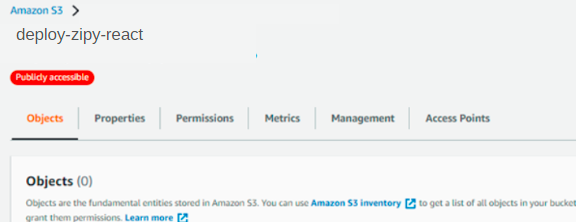
AWS S3 (Simple Storage Service) stands as a remarkably scalable and secure cloud-based object storage service provided by Amazon Web Services (AWS). Its purpose is to offer developers a straightforward and economical solution for storing and accessing data of any size, from any location on the internet. S3 incorporates an array of security measures like encryption, access controls, and logging to guarantee the secure storage and retrieval of data. Note: It's essential to have an AWS account. If you don't have one, you can create it on the AWS homepage.
To deploy react app to AWS S3 you need to follow these 3 steps.


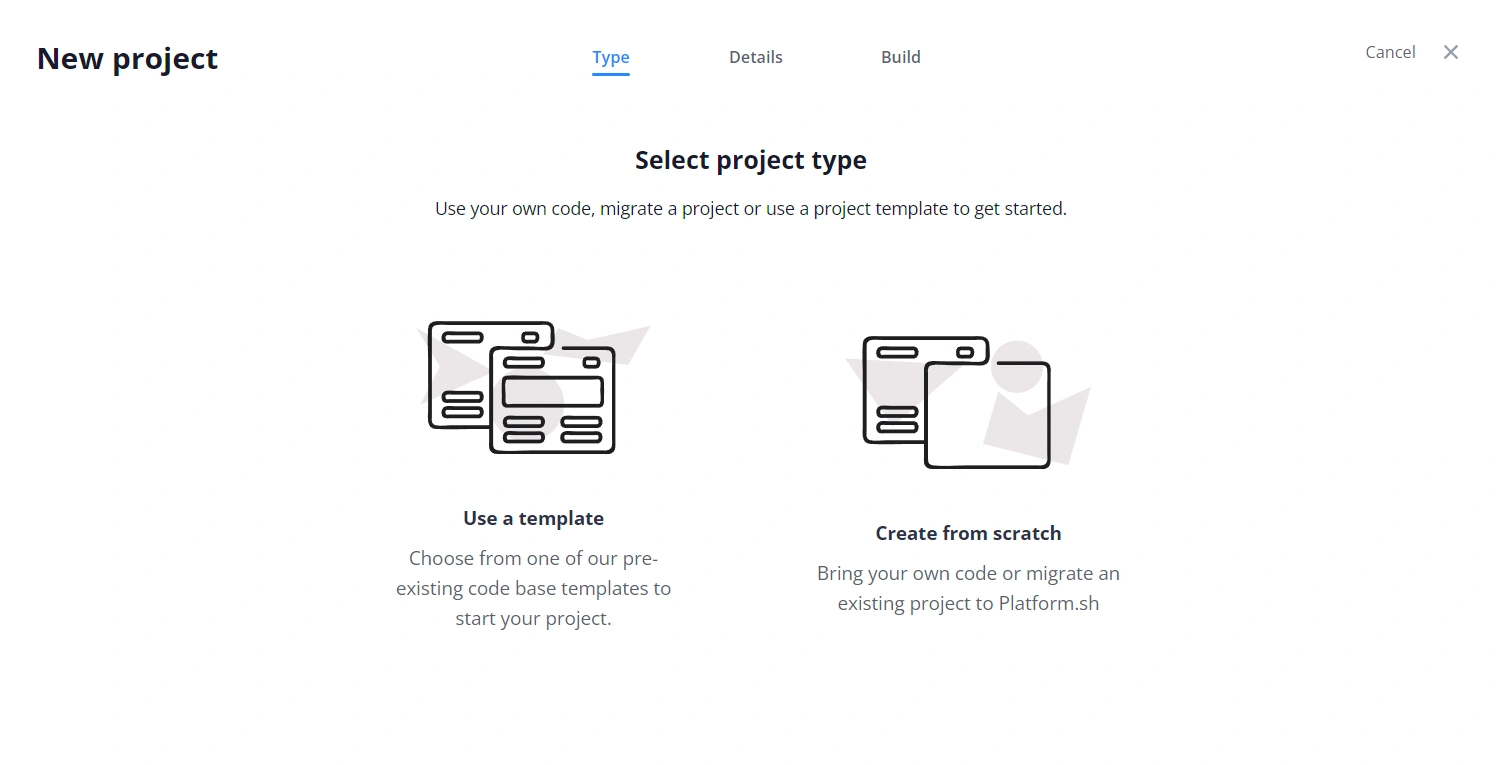
Platform.sh is a cloud hosting platform which provides a container-based application hosting service. Developers can easily build, deploy and run their application in the cloud with it. It creates development environments that closely resembles the production environments. So that you can easily test your application in a staging environment before pushing them in production.
Platform.sh offers a 30-day free trial, which you can use to test the platform. You can deploy your React app by following these steps:
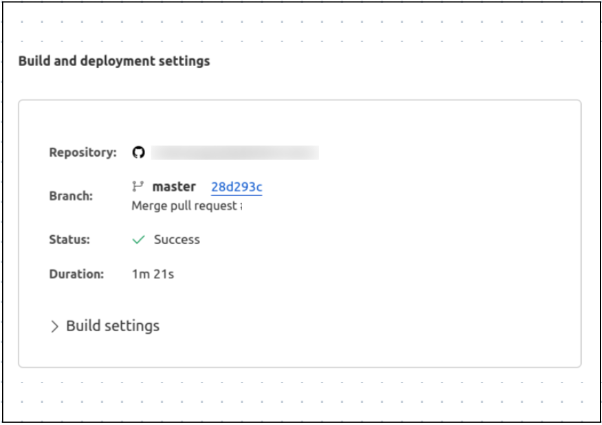
Heroku is a popular platform-as-a-service (PaaS) that allows developers to easily deploy and manage their applications without worrying about server infrastructure. Its popularity stems from its simplicity, scalability, and compatibility with multiple programming languages. While it has become a paid service, the convenience and efficiency it provides makes it a great choice for developers to try it. Let's look at two of the most common deployment process of Heroku.
Deployment using Heroku dashboard is very easy, you just need to have your project stored in the GitHub repository. To deploy on Heroku follow these steps:


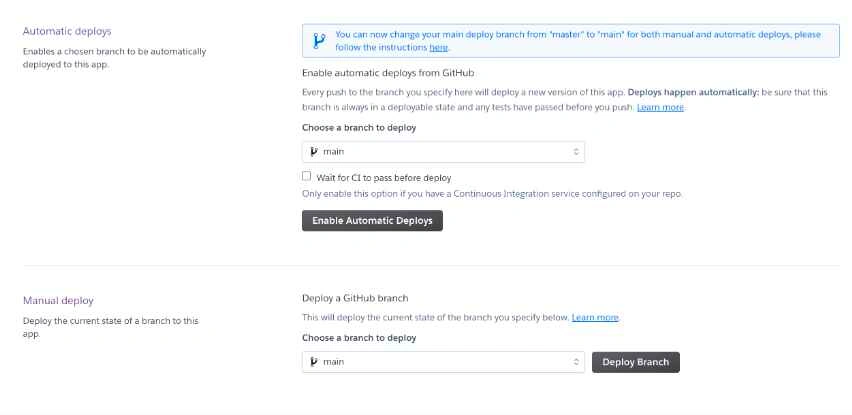
Follow these steps to deploy React app to Heroku using CLI:
The option to deploy React app for free are many, from the tried-and-tested methods like deploying on Netlify and Render, to the newer players like Vercel and AWS Amplify.
Whether you're looking for ease of use, flexibility, or scalability, you can find the right solution for your project. So why not give it a try? With the above options to choose from, you're sure to find a free deployment method that works for you. No need to make any financial commitment you just have the right tools and best practices to deploy your React app for free.
Happy coding!
Feel free to comment or write to us in case you have any further questions at support@zipy.ai. We would be happy to help you. In case you want to explore for your app, you can sign up or book a demo.
.webp)
The unified digital experience platform to drive growth with Product Analytics, Error Tracking, and Session Replay in one.


.webp)


